|
|
|


December 22, 2016
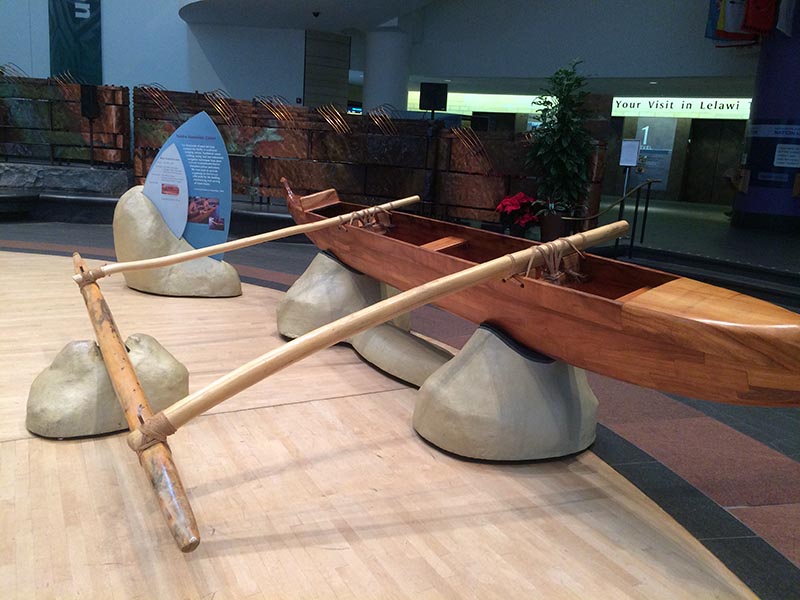
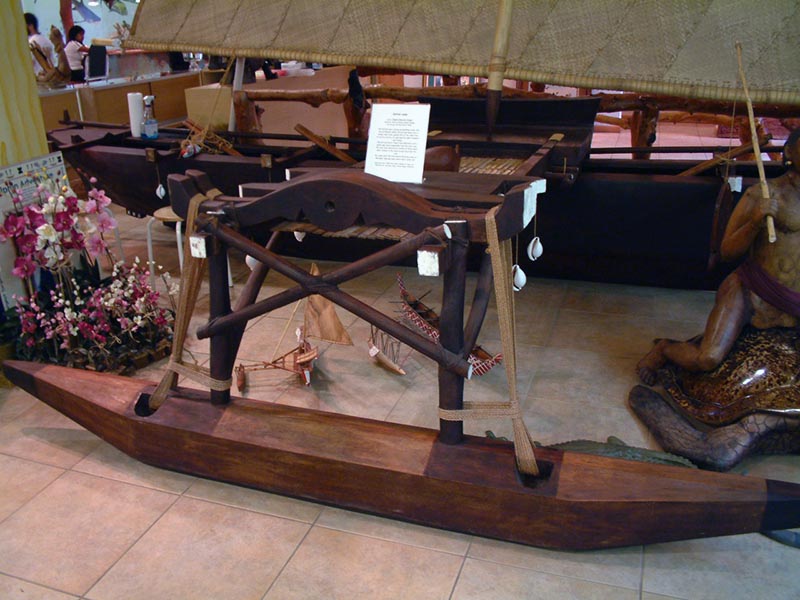
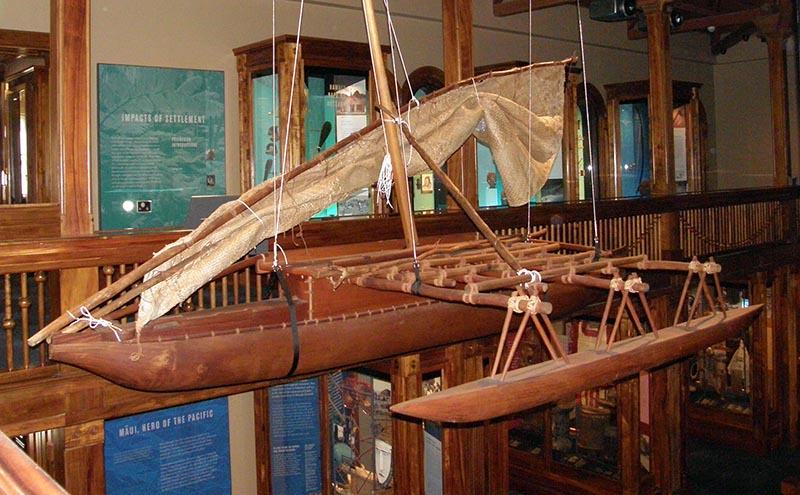
Lashing the outrigger to the booms has a great deal of variations depending on the style of canoe. So much so, in fact, that the authors of the authoritative study Canoes of Oceania began their project to study just this facet of outrigger canoe design. For the Hawaiian canoe, the booms are curved downward to meet the ama near the water level. A peg is driven through each boom into the float, and then lashed. As you can see from the photo below, it’s pretty simple, using figure-eight lashing over and around the peg, then choking it and tying it off.
Carolinian-style canoes, on the other hand, have a complicated lashing system using Y-shaped sticks stuck into the float. The ama is much shorter, and the system of booms more complex, allowing the canoe to hold a platform for transporting goods.
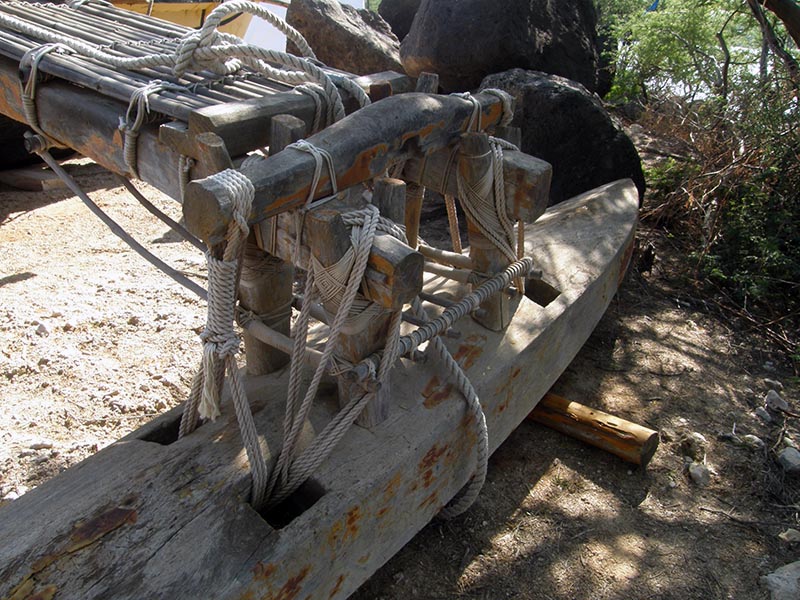
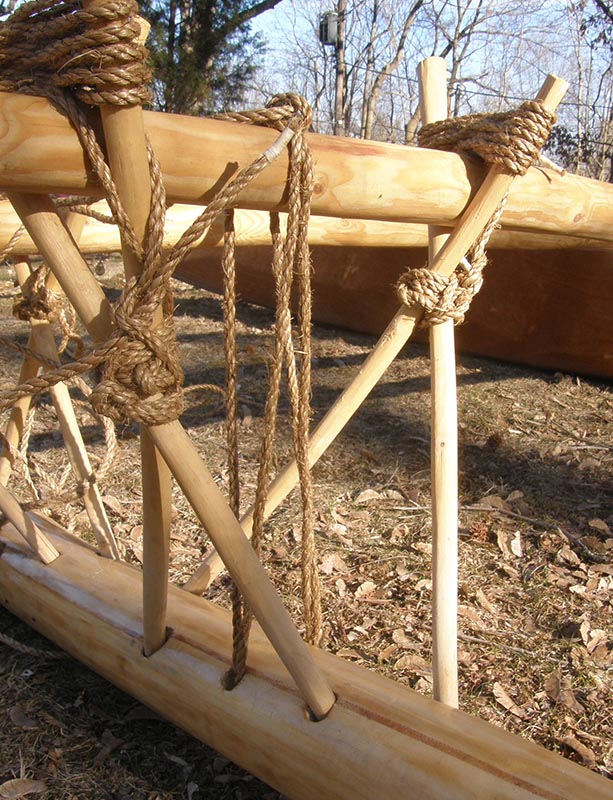
The canoe I am building, Wharram’s Melanesia design, uses a third method found around the Pacific, including…Melanesia. It involves four sticks for each boom, bored into the outrigger at different angles and lashed to the ends of the booms. That the sticks are at different angles is supposed to provide the tension that keeps them from popping out. Variations on this method can be found all over the Pacific.
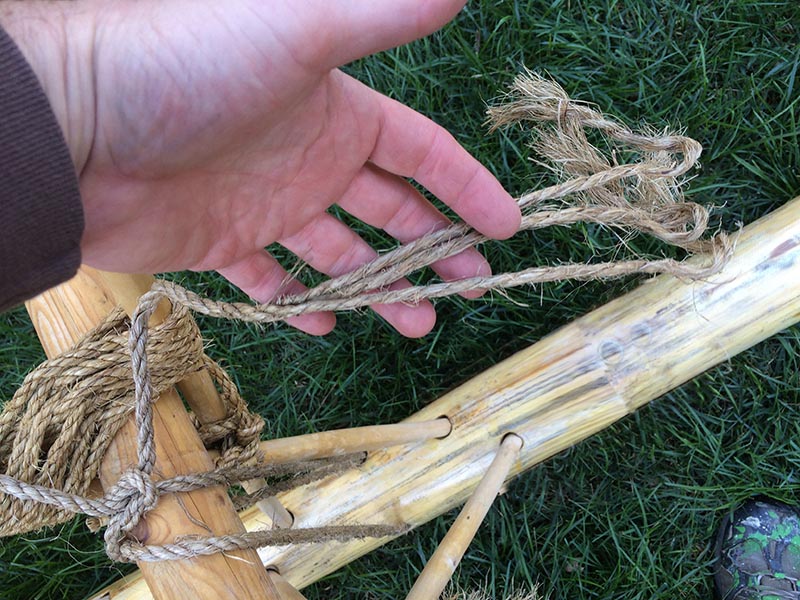
I started out using commercial nylon rope, as seen in these photos, but then decided I wanted my canoe to look as traditional as possible. At the same time, I want it to be safe and functional. And, I don’t have access to a lot of coconut sennit. So I used manila rope from the hardware store, which is the next best choice. Compared to the synthetic ropes used on today’s sailboats, manila rope is rough, less durable, far less strong, but like sennit, tends to swell up a bit when wet. I used it for lashing the booms to the outrigger, but not for lashing the booms to the hull. For that last part, I used a thinner synthetic rope that is strong, light, and easy to tie and untie. Wharram’s plans for this canoe didn’t include holes big enough for a larger, natural-fiber rope, so I needed something smaller, yet strong. 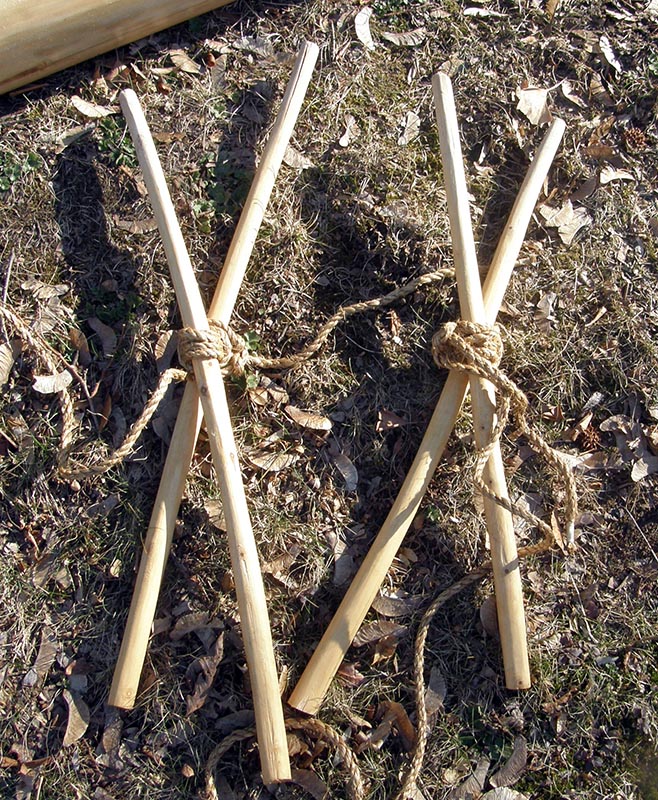
I keep these X's lashed together, even when they are not on the canoe. Saves one step in the whole lashing process. Now the outrigger is a different story. The end of each boom sits in the top of two pairs of X’s formed by the crossed sticks. Then you lash over the top of the X and it holds the boom down. As I mentioned, the tension caused by the different angles of the four sticks is supposed to make them all stay put. Well, there I was out on the Chesapeake Bay in high winds when I noticed some of them had come out! If the entire outrigger fell off, I was done for. The hull will not stay upright without it. So headed quickly back to shore, and reconsidered. I thought about those Carolinian canoes in Micronesia, where the much-smaller outrigger was also attached by “sticks” (Y-shaped), but there were also holes that went through the outrigger itself to tie it securely to the booms. Not around and under the outrigger, because that would add drag. So I drilled holes through my own outrigger and lashed through those in addition to the lashing on the sticks. Now that I have ropes going through the outrigger and up and around each of the three booms, I feel oh-so-much more confident! That ama is on snug and tight. It has never since shown any sign of coming loose. A bit more work, but I think it looks pretty neat too!
Left: Note the rope going through the outrigger float itself, then up over the top of the boom. These pull the two tight together, so that even if the sticks of the X’s come loose, they cannot come out. Right: Now you see lots and lots of lashing at the tops of the X’s. This is because I had a handful of spare sections of manila rope left over from my first attempt at rigging this boat, and decided to use them for the lashing. So I whipped them before I had realized that they were significantly longer than needed. Well, I hate to cut ropes (or, can’t be bothered to re-whip them) so I decided to make these decorative in their lashing. A bit over-the-top—literally—but what the heck? Perhaps next summer I will reconsider. In another post, I will tell a story of how sturdy my new system proved to be.
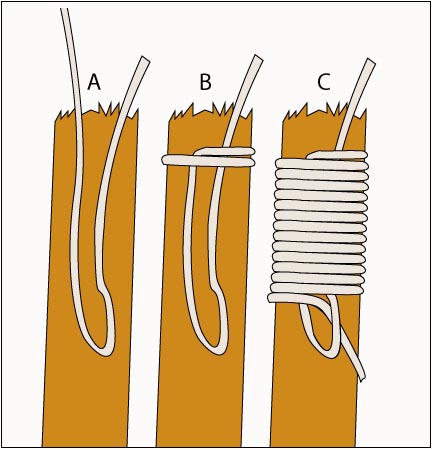
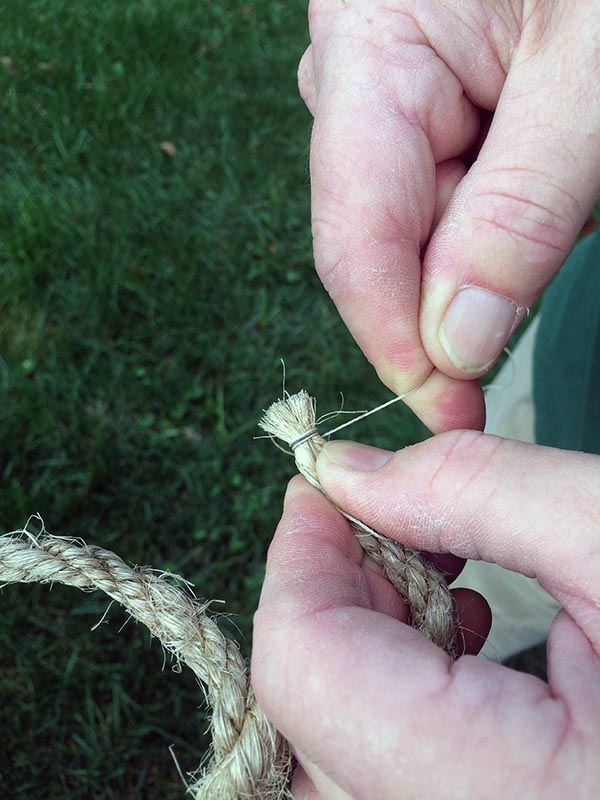
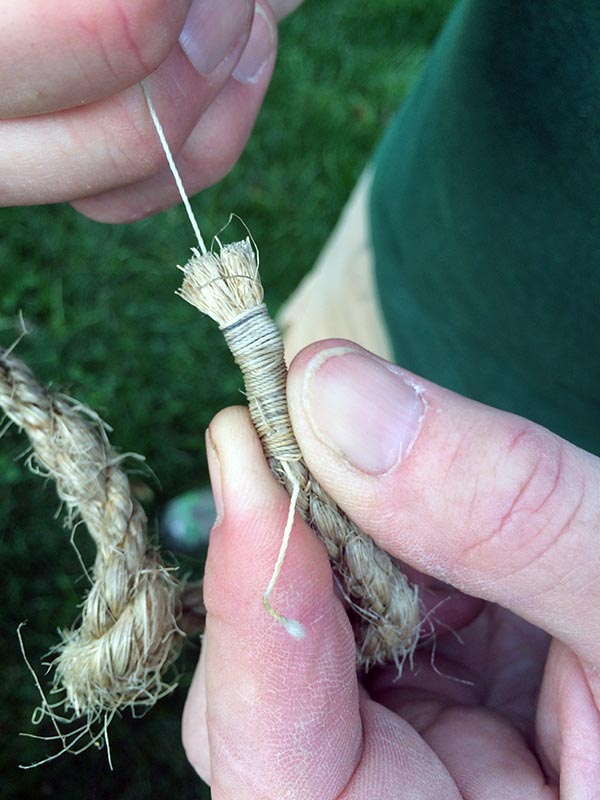
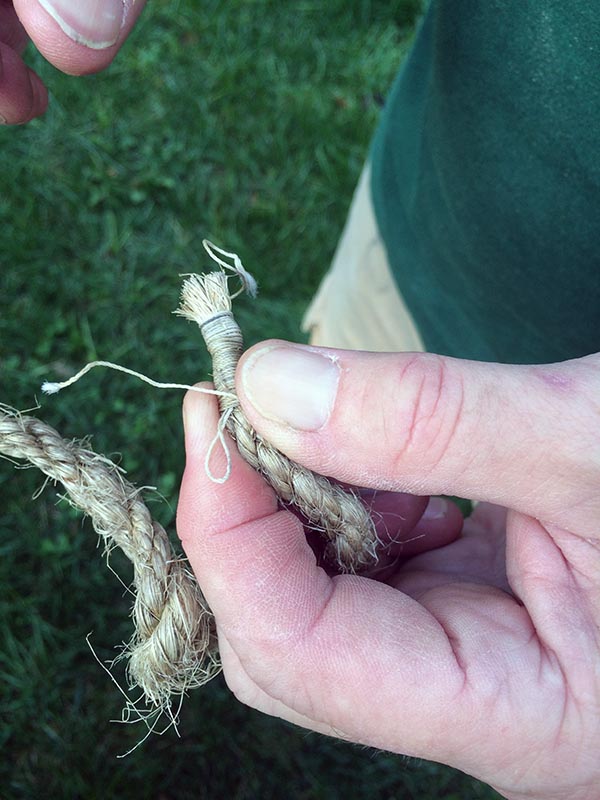
Whipping Rope? Now you probably have experienced the problem with any twisted rope—or even string—that when you cut it, the ends start to unravel. To stop this, you must “whip” the rope. This is an easy technique that I learned by chance on YouTube one day. Using 2-3 feet of waxed thread (you can buy pre-waxed “whipping thread” at boating supply stores), you make a half a loop and lay it against the end of the rope, the top of the loop away from the cut rope end, and the tail of the loop extended a few inches beyond the cut end of the rope.
Then, starting at the cut end of the rope (some people say the loop should be towards the cut end, but whatever), you wrap this thread tightly around, working your way towards the loop. When you have maybe a good inch wrapped like this, you put the thread through the loop and pull it tight. Then you grab the tail of the loop and pull the loop (and with it, the other end of the thread) through, under what you just wrapped. Voila! Cut off the excess threads, and your rope is whipped! For this project, I had to whip a lot of ends of ropes, and got pretty efficient at it. It really doesn’t take long at all.
|
||
—RDK Herman Next: Part 11: Making the Sail |
||

|
||


Copyright 2016, Pacific Worlds & Associates |
