|
|
|
August 22, 2013
|
||
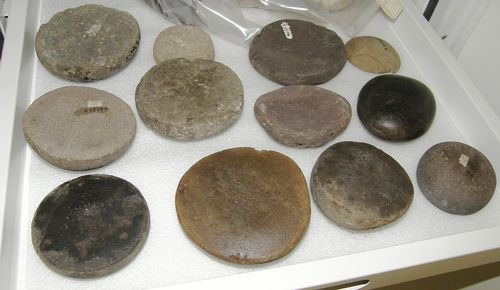
In modern boatbuilding, there’s a saying that the work is 90 percent sanding. Well, that has largely to do with the epoxies and varnishes used, numerous layers of which need to be applied, with sanding between each coat. But it is entirely possible that for Hawaiians of old, sanding was still a very big job. Reason? No sandpaper. So, what do you use? In the blog entry on tools, I mentioned how lava rock is not all created equal. Depending on the mineral content of the eruption and how fast the lava cooled, there is a wide range of densities and textures of lava rock. As the 19th-century Hawaiian historian David Malo documents, “A great many names were used to distinguish different kinds of rocks.” In fact, Malo designates 53 different types, each with its uses. Of these, the kinds used for smoothing and polishing are identified as a-na, ka-wae-wae, o-ahi or o-la-i, o-i-o, po-hue-hue, and puna. Whether anyone today knows which of these is which, I do not know.Â
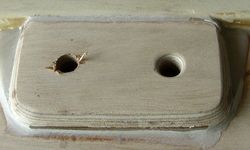
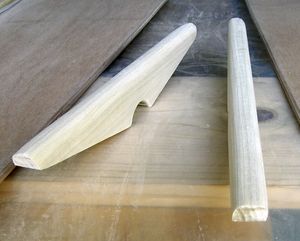
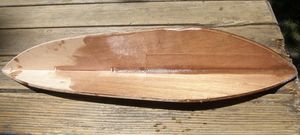
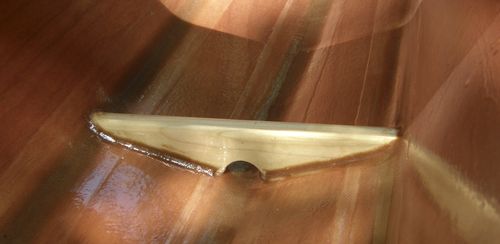
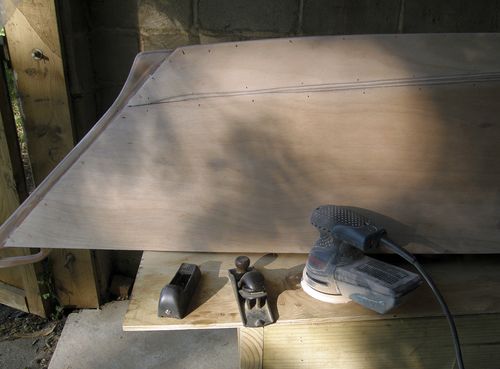
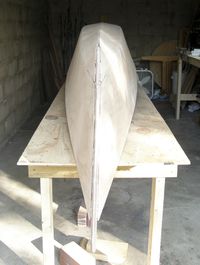
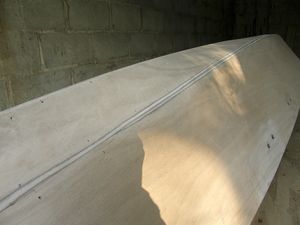
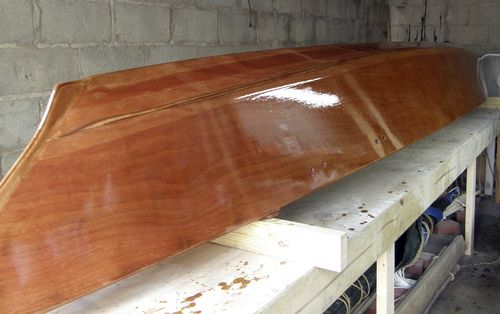
As you can see from the photo above, there is quite a range of textures and colors among polishing stones, including coral stone as well as basalt. Once again, I first imagine the craftsmen who made these stones—chipping and grinding chunks of rock to make flat-faced disks—and then the craftsmen who used them, grinding away at the surfaces of the canoe to make them smooth. Sharkskin was the finest grade of sandpaper available. I do not know whether it was used in canoe-building, but possibly so. I've seen the Kapi‘olani Canoe up close and can attest to its smoothness. Today of course we have a wide range of tools, and the work can be remarkably quick and magical. Behold two holes (above left) drilled for where one of the booms will be lashed to the hull. The hole on the left is freshly drilled; the one on the right has already been sanded. What a difference! Then there are the two mid-braces (right), cut out of a poplar board. A little grinding and sanding and they have lovely curved tops and smooth edges. Sanding is transformative. Let us rejoice in it! Okay, now back to the stitch-and-glue process. After the pieces of the canoe are all stitched together, the major gluing begins. I am using a marine epoxy system that involves pumping epoxy resin and hardener in prescribed amounts, mixing them well for quite a while, and then applying the mix (also called epoxy) in different ways for different purposes. In this case, the resin-hardener mix is combined with wood flour (powdered sawdust the consistency of flour) into a thick, peanut-butter-like substance. This is carefully spread along the inside of each seam, a process called filleting. (It’s pronounced “FILL-it,” not “fill-A,” easy to remember because that’s what it does: fill it in.) Once the epoxy coating is hard and dry, you sand the surface smooth, then run 3-inch fiberglass tape over the filleted seam and epoxy over that layer. Sand and epoxy again, and you have a smooth, rock-hard, durable seam. I created a little demonstration piece (right) that shows these stages. Toward the left point is bare wood stitched together with copper wires. Then the same with a coating of epoxy. Then the brown filleting, then the fiberglass over the top, and finally recoated with epoxy. Here (above) is the inside of the canoe showing the brown fillets along the seams and also around the mid-brace. I filleted around the ends of the seats also, where they meet the hull. The brown of the filleting does not quite match the color of the wood, but oh well. The important thing is that the canoe holds together when I put it in the water. Once the fillets are done, you flip the canoe over and carefully cut off the copper wires as close as possible to the hull. These have served their purpose and aren’t needed any more. (Inside the canoe they are hidden under the fillets.) Then with various sanding tools, you grind the sharp seams where the planks meet into nice smooth, rounded edges. These too get epoxied and fiberglassed (but not filleted; that’s just for the inside). See those stripes at the rounded edges? They are the layers of the marine plywood. Above you see the hull of the canoe, where the copper wires have been snipped off, and some of my key tools: a rasp, which shaves wood down nicely; a plane, which takes off strips and is best when the wood is straight and level; and the wonderful random-orbital sander. What makes it “random,” I don’t know, but it works really well. Below you can see that the hull, which after stitching looked kind of like Frankenstein on a bad day, is smoothed and rounded into something that actually looks like a boat! The epoxy and fiberglassing then takes place on the outside, hiding over those stitching holes and giving the whole thing a nice, smooth, glossy finish. Before taking the photo below, I've already put several coats of varnish on the hull, which makes it shiny. 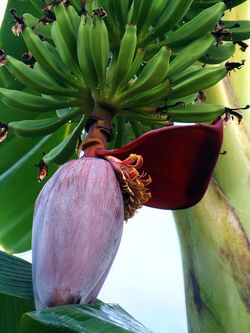 Banana flower, Samoa. After the plant has produced bananas, the leathery flower continues to bloom for a long time. The sap of the banana tree stains very strongly. Don’t get it on your clothes!
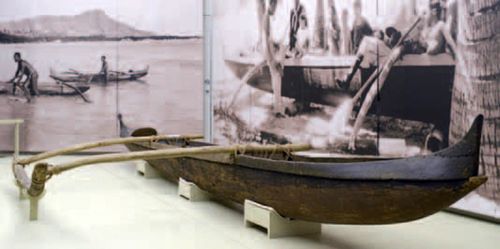
You may be wondering what Hawaiians did to protect the hull, since they didn’t have epoxy and varnish. Apparently there were many types of organic paint (pā‘ele) that Hawaiians mixed. In The Hawaiian Canoe, Tommy Holmes writes that the common ingredients included juices from the buds and twigs of the ‘akoko (a type of Euphorbia), the flowers and buds of the banana, and the red inner bark of the kukui tree. A liquid was obtained by pounding and grinding these; then the liquid was mixed with powdered charcoal (some plants provided the best ash or charcoal for this purpose) before being strained. Applied to the hull of the canoe (but not the gunwales), this painted it black. Quoting Z. P. K. Kalokuokamaile’s 1922 Hawaiian newspaper article on canoe-building, Holmes notes that on some canoes, such as those made for chiefs, hens’ eggs and other herbs were then used to make the hull shiny “so that the images of people could be reflected in the sides of the canoes.” Similarly Holmes quotes N. B. Emerson as saying that instead of charcoal, sometimes ochre or red earth was used to give the hull a reddish color, especially for chiefs (red being the color of chiefliness)—the “red canoe of the king” (wa‘a ula o ke ali‘i). It may seem hard to believe that this mix of plant juices, charcoal, and possibly dirt protected the hull, and apparently many Westerners who watched the process were skeptical. But Holmes asserts that the pā‘ele was equal to many of the protective hull paints used today. Certainly many Hawaiian canoes lasted for quite a while. And given the amount of work to make one, that’s a good thing. —RDK Herman Next: Part 7: Outrigger and booms
|
||

|
||
Copyright 2016, Pacific Worlds & Associates |
